


Easy 6-pattern Bead embroidery
This page explains how to embroider beads and points with photos and GIF videos.
The basics of bead embroidery for embroidery beginners. This is a bead embroidery method that can be completed with just a needle.
It explains 6 patterns of bead embroidery, including the method of attaching beads straight, two methods of filling the surface with beads, embroidery of bead fringes, and the method of embroidering stones.
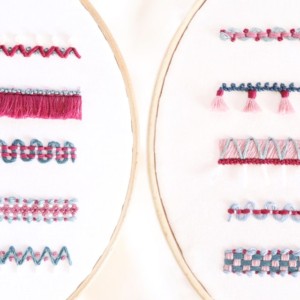
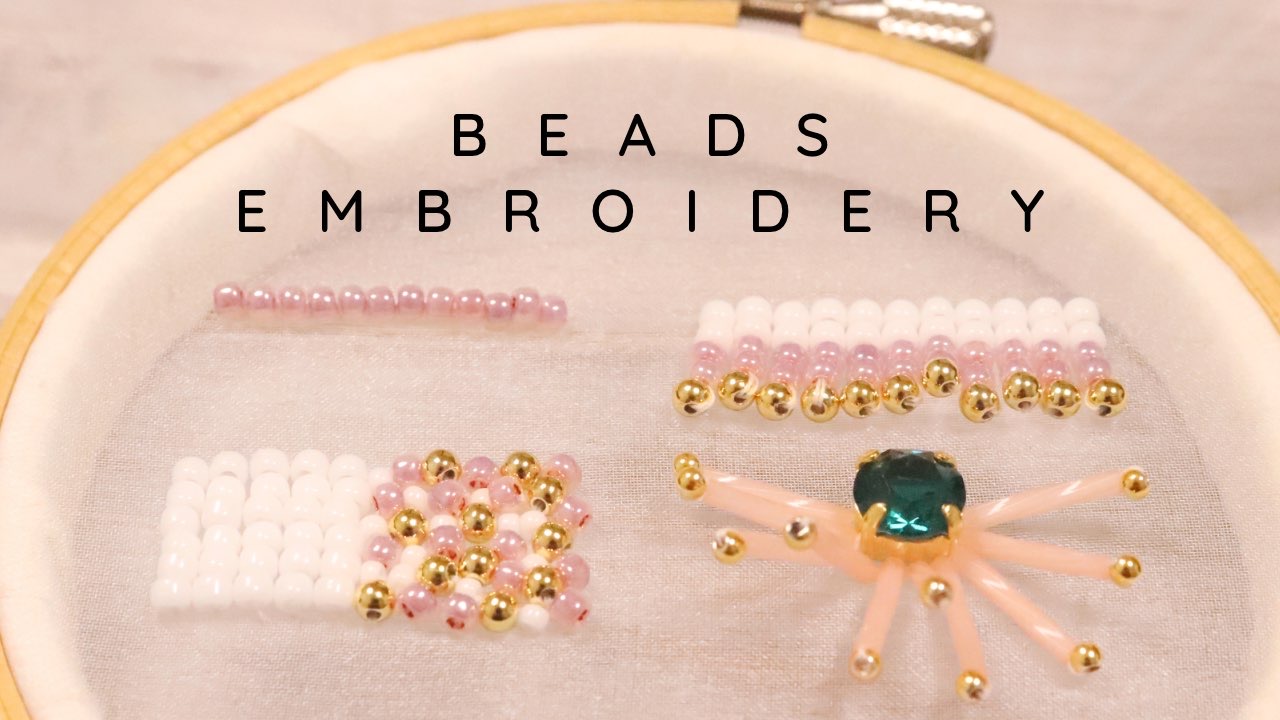
Beads embroidery
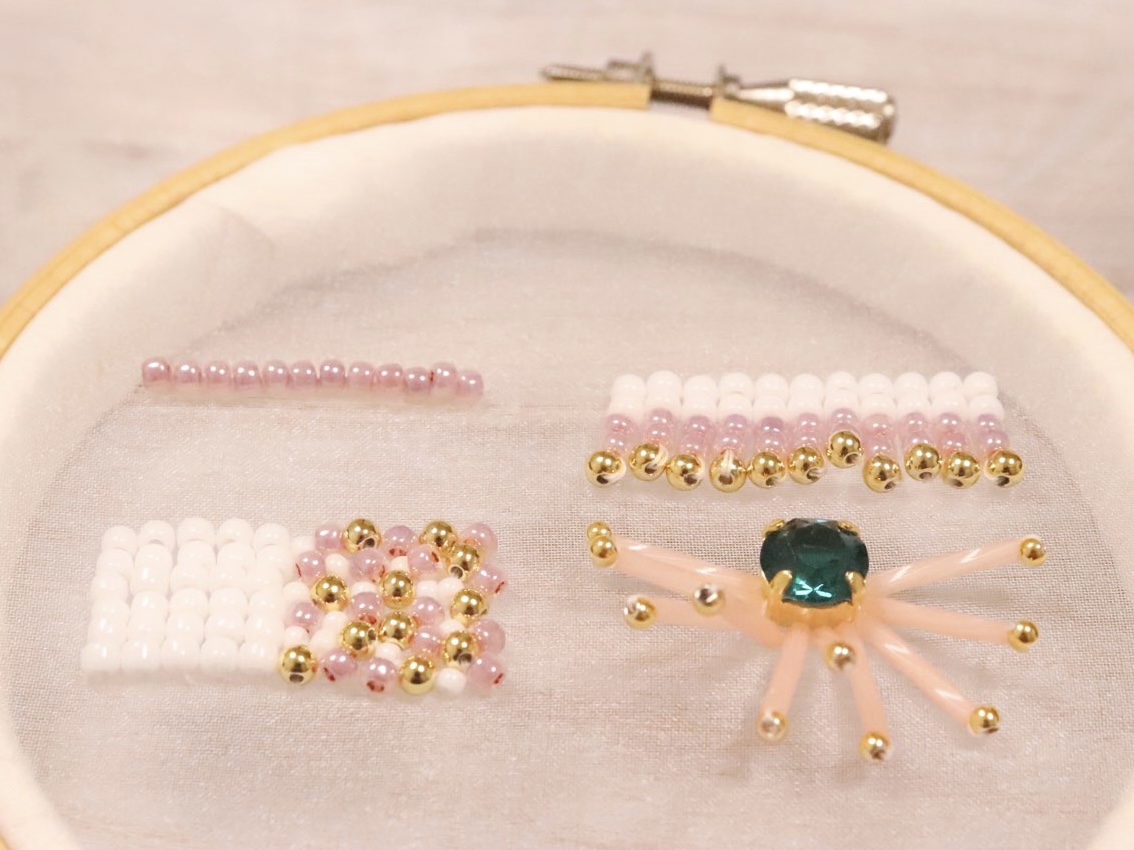
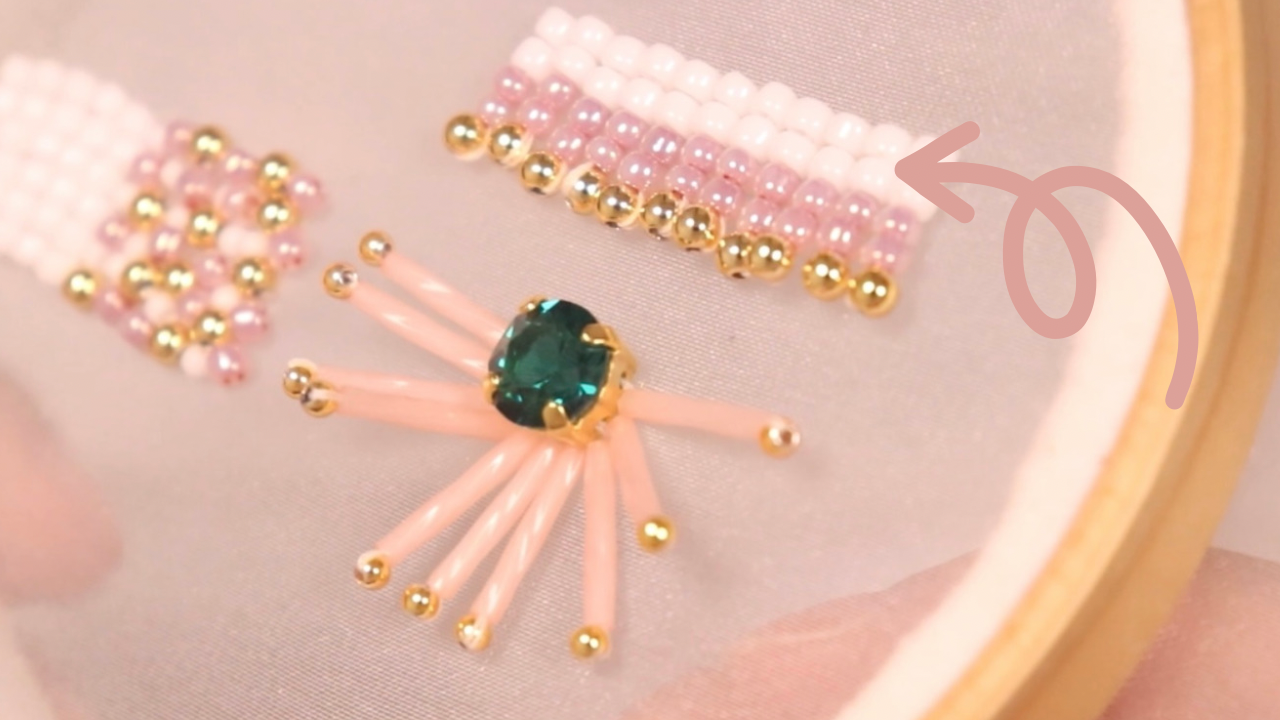
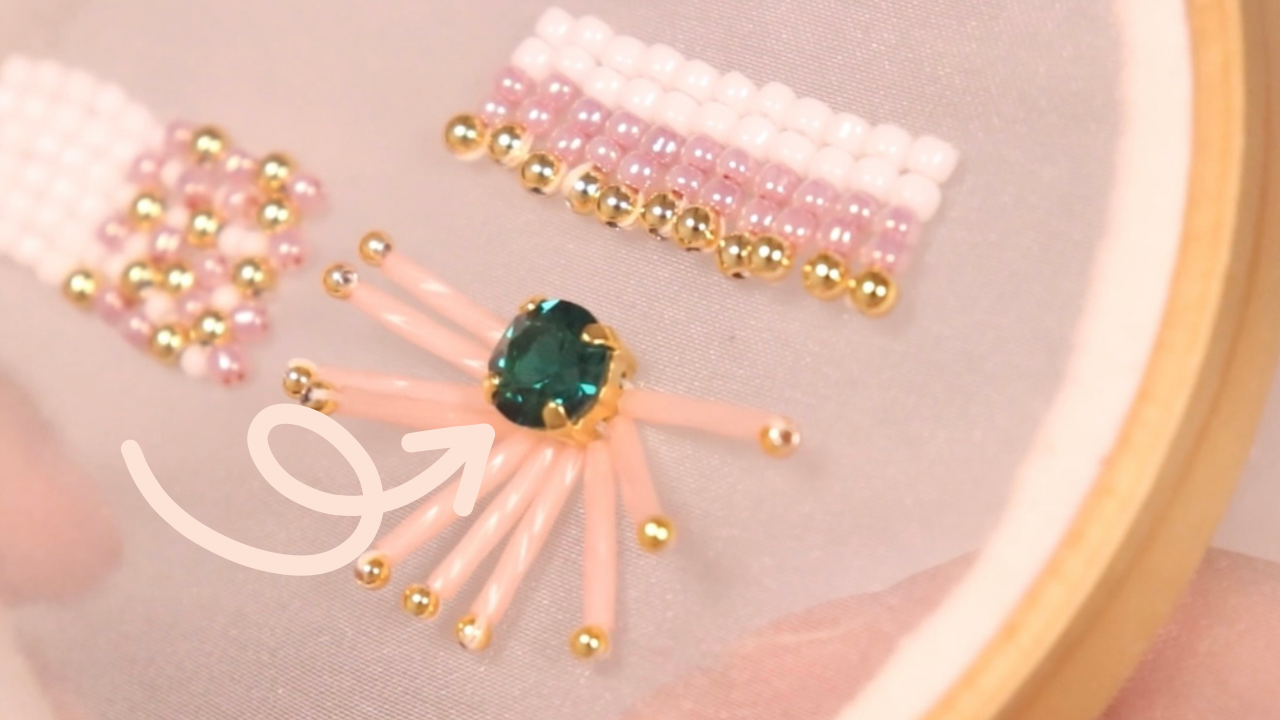
Upper left:Embroidering beads straight
Bottom left left side:Line up the beads straight to fill the surface
Bottom left right side:Randomly embroidered beads to fill the surface
Upper right:Embroider a beaded fringe
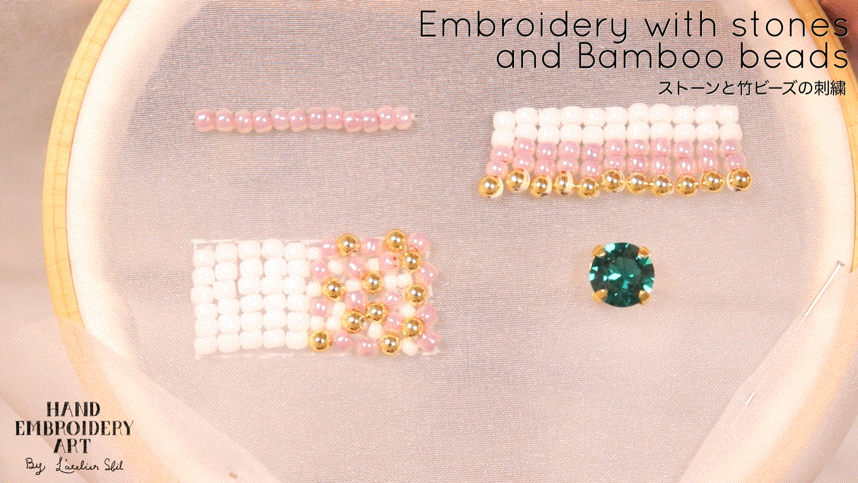
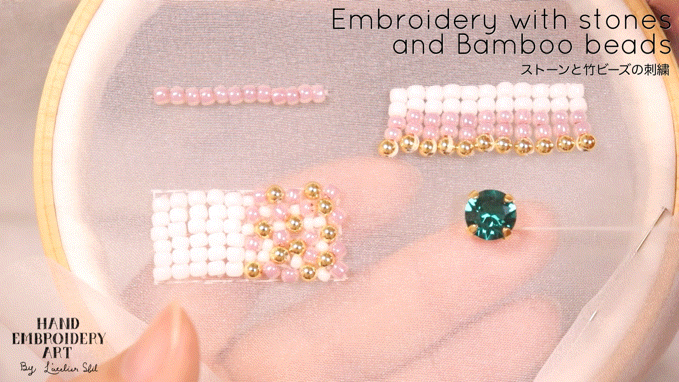
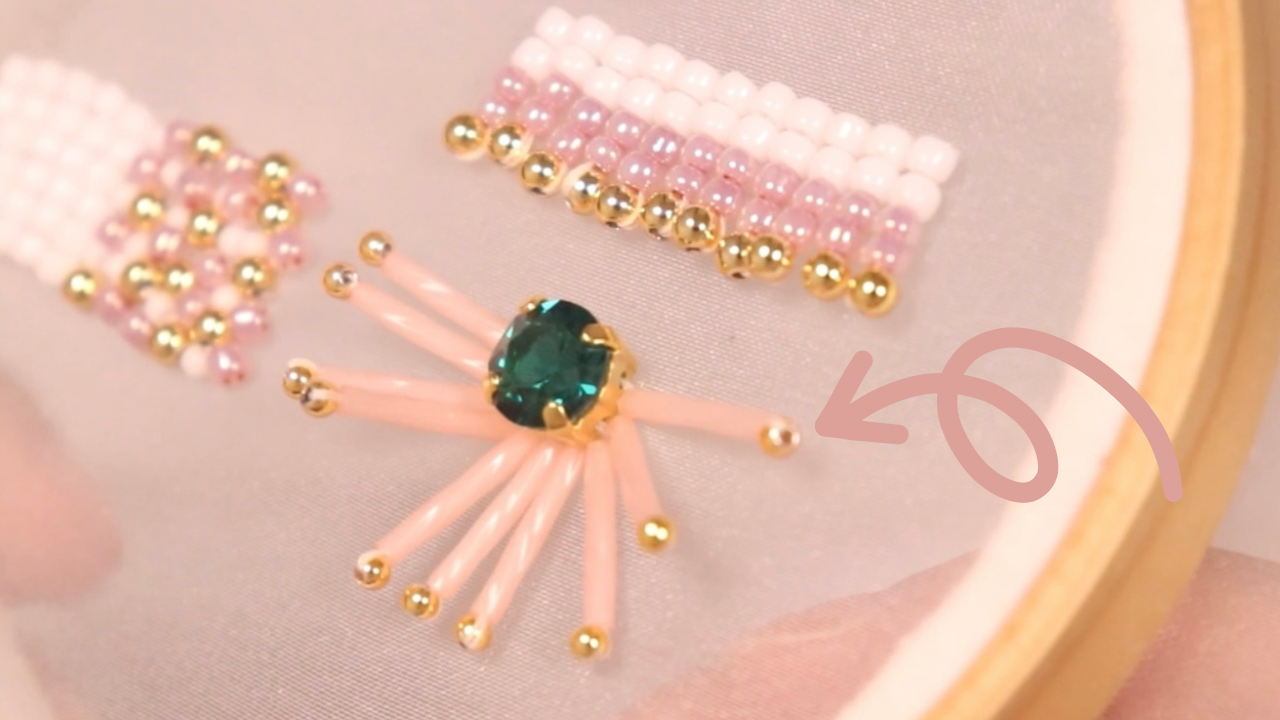
Bottom right:Embroidery with stones and bamboo beads
Table of contents
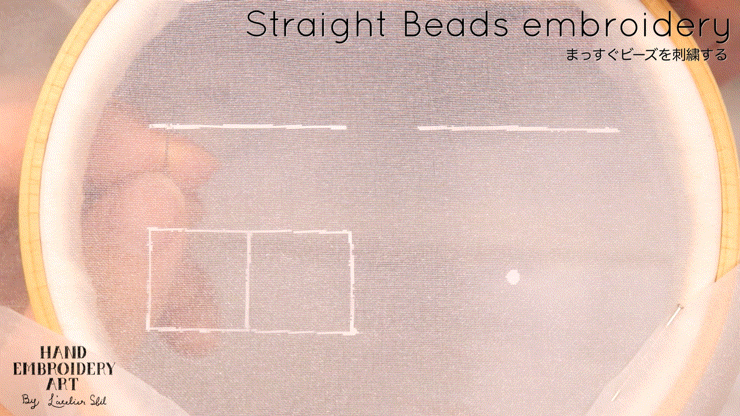
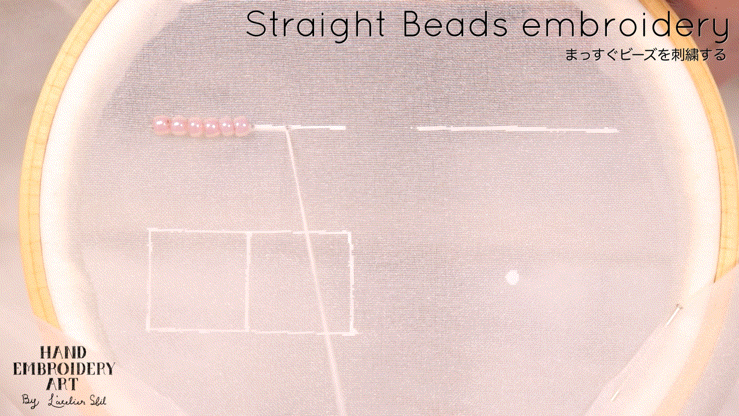
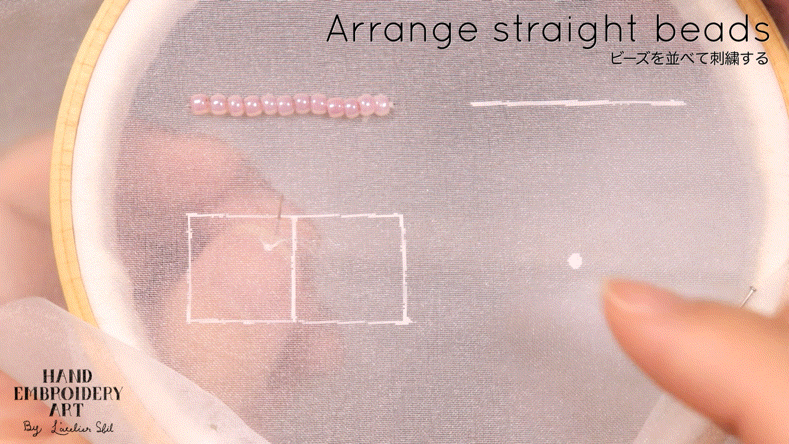
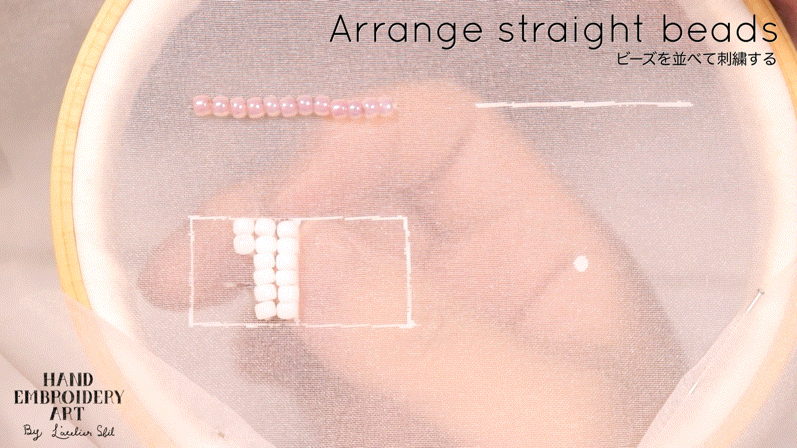
【1】Embroidery the beads straight
【2】Fill the surface by arranging the beads straight
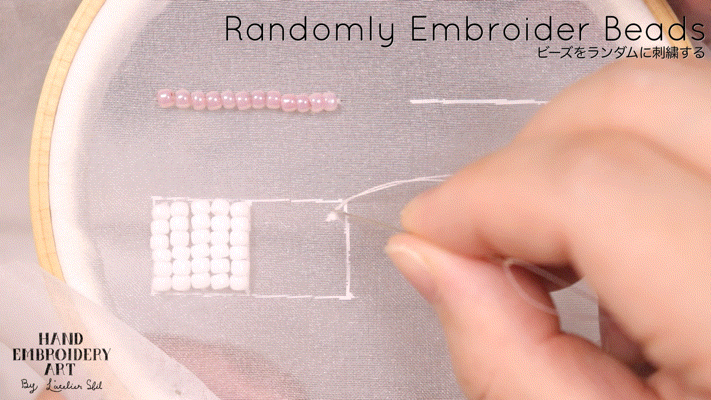
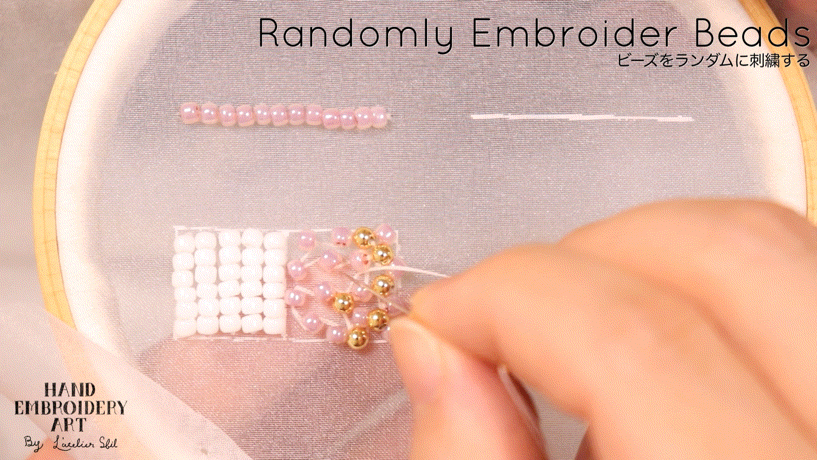
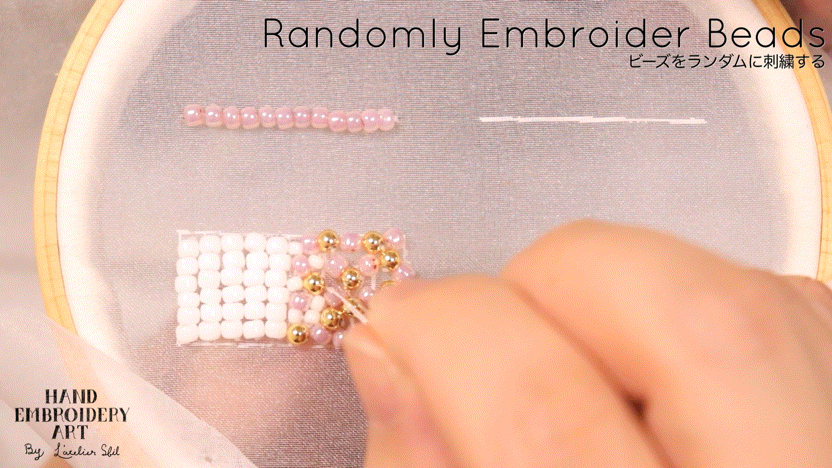
【3】Embroidery beads randomly and fill the surface
【4】Embroidery the beads fringe
【5】Embroidery the stone
【6】Embroidery the bamboo beads
Embroidery the beads straight
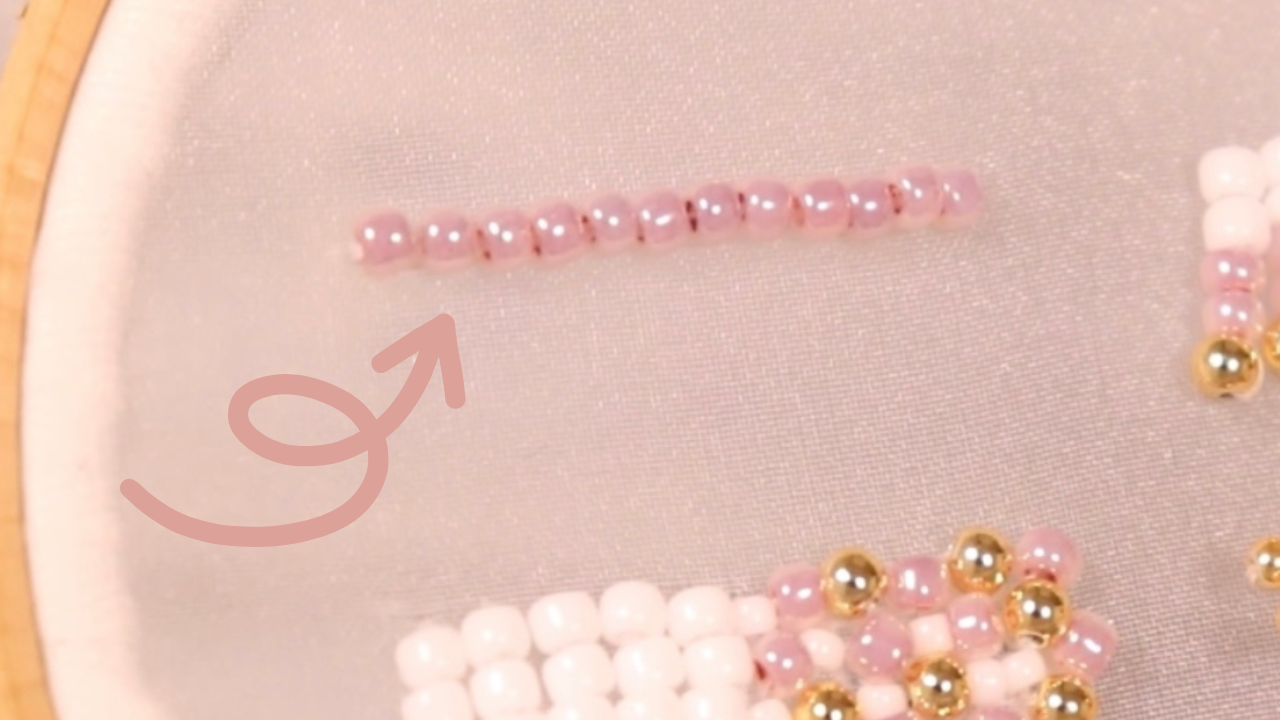
Pass the thread through the bead just before one and proceed with the embroidery.
By passing the thread through the bead just before one, will prevent the beads from coming apart.
By embroidering one bead at a time, you can connect the beads firmly.
Beads are fixed more firmly if you embroider them one by one.
When arranging beads or other embroidery stitches around it, the beads will be supported, so it is OK to embroider 2-3 beads at a time.
When embroidering two or three beads at a time, pass the thread through the one bead in front of you.
Fill the surface by arranging the beads straight

Line up the beads in the same way as straight embroidery
Tie the thread in a knot.
Later, embroider one stitch near the place where the beads will be hidden and where you will start stitching.
Arrange the beads in the same way as the straight embroidery method.
Since the beads are spread out, it is hard to come apart even if two or three beads are embroidered.
Embroidery beads randomly and fill the surface
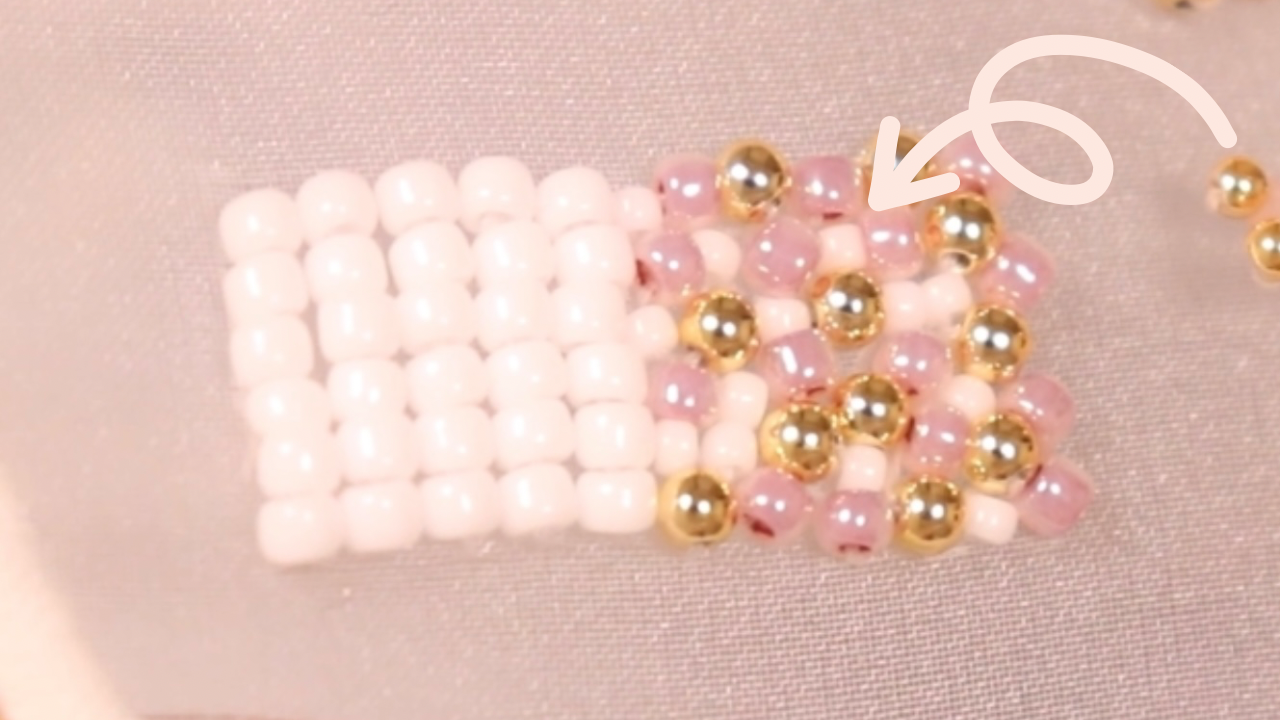
Embroider main color beads and large beads first
Tie the thread in a knot.
Later, embroider one stitch near the place where the beads will be hidden and where you will start stitching.
By embroidering from the main color beads and large beads, it becomes easier to balance the overall arrangement.
Embroidery the beads fringe
Thread the beads except for the last bead
Thread the beads except the bottom bead to create a fringe.
Embroider a straight stitch between the beads as shown in the video.
By doing so, you can fix the position of the fringe.

Embroidery the stone
Thread the stone a total of 3 times
Tie the thread in a knot.
First, embroider one stitch in the center where you want to embroider the stone.

The stone has two holes for the needle to pass through.
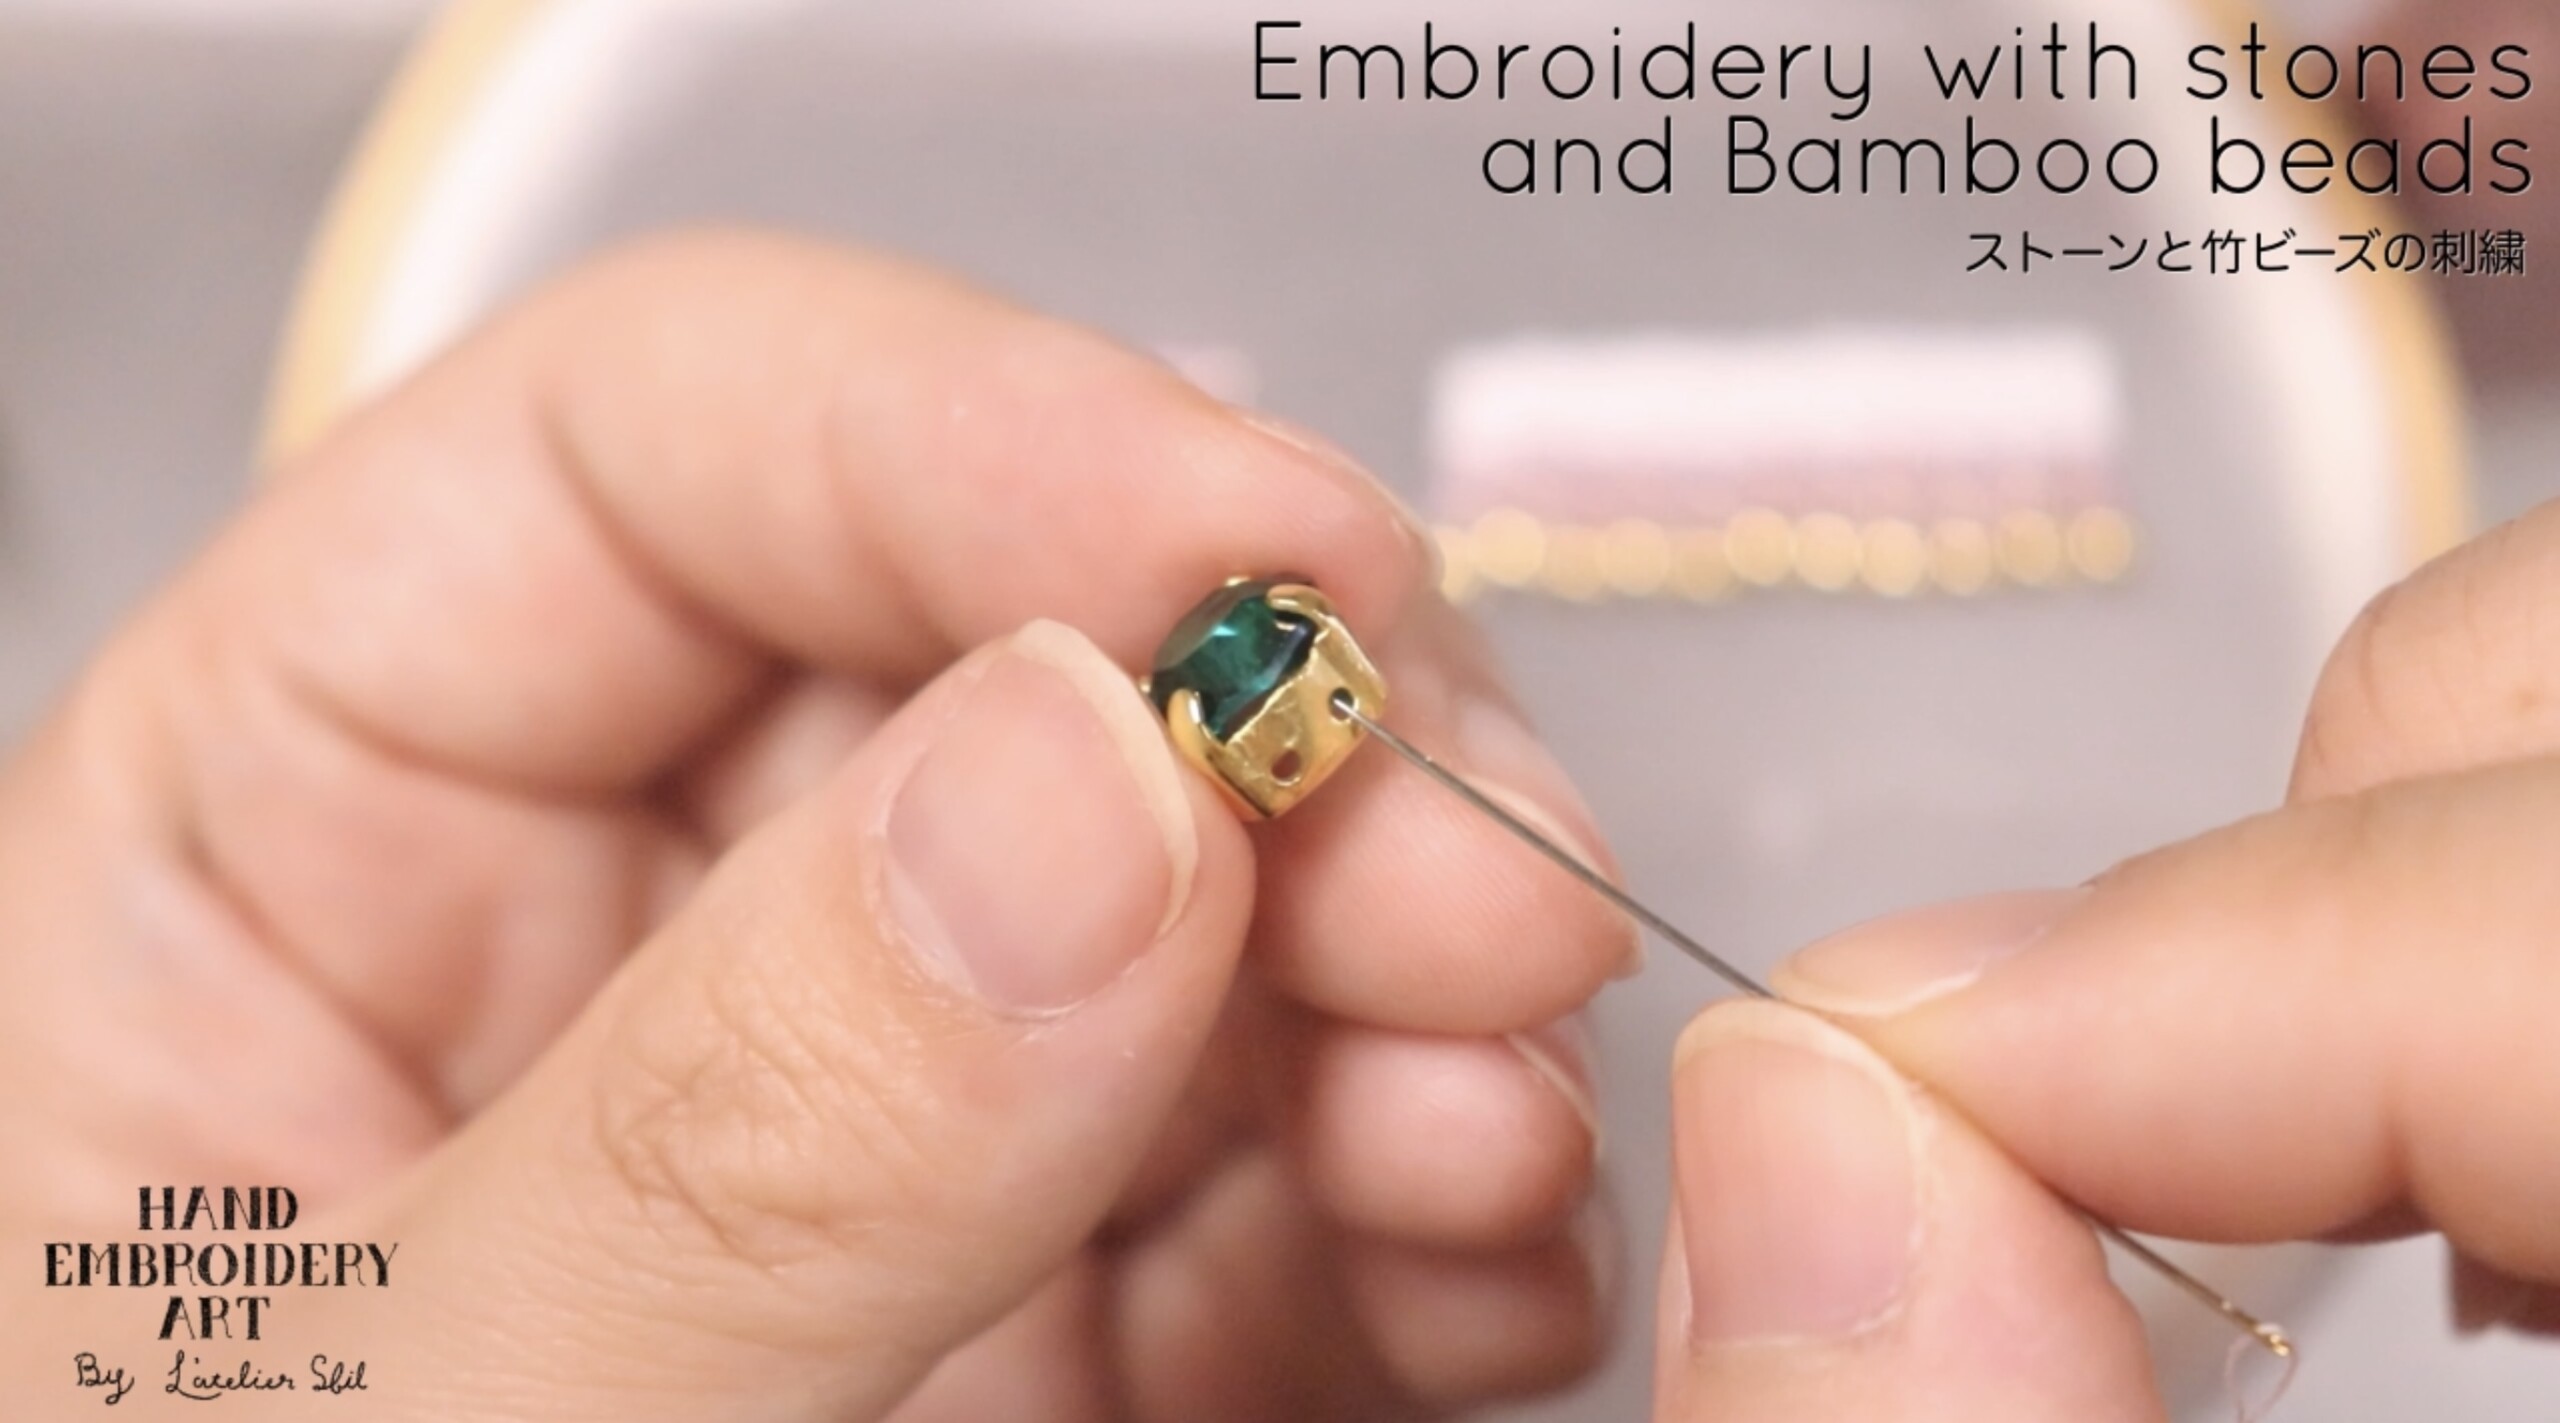
You can fix it firmly by passing the thread through one needle hole of the stone once and through the other needle hole twice.
Embroidery the bamboo beads
When embroidering with bamboo beads standing up, combine bamboo beads + other beads
In the same way as the beaded fringe, except for the last bead, thread it.